
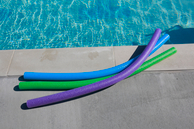
I have visited many aquatic centers and all of them have noodles. Noodles are affordable and versatile – it is amazing how many things you can do with noodles! You can use them for upper body strength training, lower body strength training, core strength training and balance. And they are just plain fun to use! This article is not an exhaustive list of all the things you can do with noodles, but perhaps there are a few here that you may not be familiar with.
Hold the Noodle in Your Hands. When you hold the noodle in your hands, you want your hands to be shoulder distance apart. If the hands are too narrow, the shoulders are rounded. If the hands are too wide, the shoulder blades are out of neutral. In this position you can:
- Push down in front for the shoulders
- Row for the upper back
- Do a triceps extension
- Push forward for the chest and triceps
- Push ups for the chest – in a lunge position, a plank position, or suspended
- Yoga plank for core strength and stability
- Plank scissors – lift one leg toward the surface of the water and lower
- Fall forward, tuck and stand up for core strength and fall recovery
- Burpees – from a plank position, hop into a squat, jump up, squat and hop back into a plank position. In deep water you would flutter kick with elevation instead of jumping up. Click Burpees for a video demonstration.

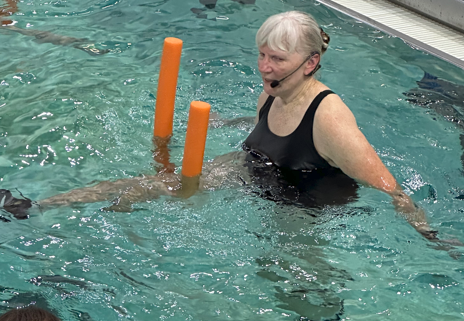
Hold the Noodle Like a Rainbow. In this position you can:
- Push and pull the ends with cross-country ski, for the chest, triceps and upper back
- Touch the ends together with jumping jacks for the chest
- Hold the ends together and press the noodle under water for the lats and shoulders
Hold the Noodle with One Hand. In this position you can:
- Swing the arm with cross-country ski for the shoulders
- Lat pull down with jumping jacks for the lats
- Plunge down at the side for triceps
- Yoga side plank for core strength and stability
- Side Plank Pliers – lift the top leg toward the surface of the water and lower
- Side fall, tuck and stand up for core strength and fall recovery. Practice turning to fall forward since falling sideways on land can lead to hip fractures while falling forward and landing on forearms is safer.
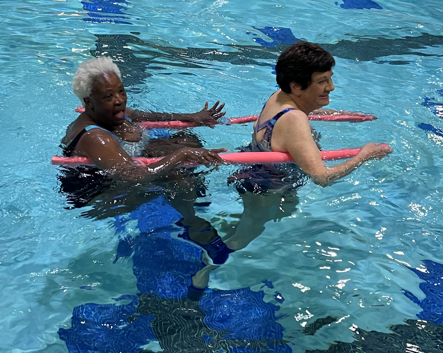
Wrap the Noodle around Your Waist. In this position you can:
- Perform a rotator cuff sweep
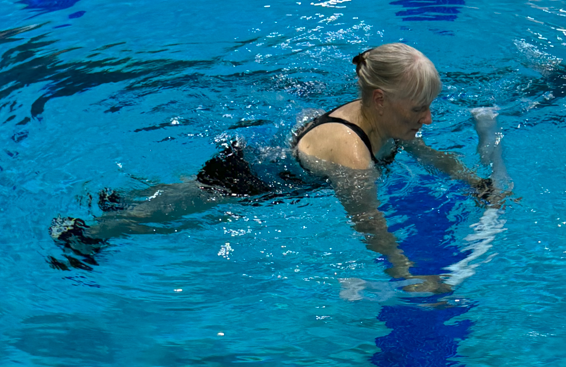
Wrap the Noodle around Your Back. This is a stable position for suspended moves. You want to position the noodle mid-torso, just below the shoulder blades. The noodle can cause shoulder impingement if it is right under the arms and potentially damage the nerves in the armpits. Place your hands on the ends of the noodle to keep it below the shoulder blades. In this position you can do:
- Suspended kicks for the quads and hamstrings
- Suspended jacks for the inner and outer thigh
- Bicycle for multiple leg muscles
- Waist twist for the obliques
- Pilates Single Leg Stretch for the core – Bend one knee and lift the opposite leg (see photo above)
- Flex one foot and lower it towards the floor, point the toes and lift it back toward the surface for core strength
- Stretch the arms out to the sides and go into a side-lying position. In this position you can do side-lying cross-country ski, side-lying bicycle, side-lying bicycle in a circle, and side-lying bicycle reverse pedal in a circle.
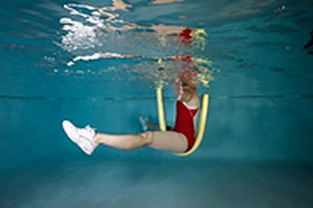
Sit on a Noodle Like a Swing. In this position you can perform many of the same moves as with the noodle around your back, but it is more of a challenge to balance. In addition to kicks, jacks and bicycle, here are some other things to try:
- Mermaid – unison kick, like pumping your legs in a swing
- Bicycle with one leg
- Kick one leg across and sweep it out to the side
- Extend the legs and point and flex the feet
- Hip hike for the obliques
- Brace the core with arms down at the sides and make turbulent hand movements
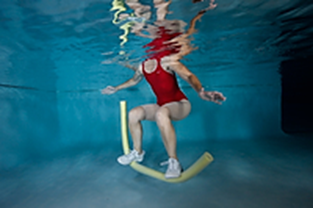
Sit on the Noodle Like a Bicycle. Be sure to sit in the center of the noodle, If you sit too far back, the noodle will be in your face and you may tip backwards. If you sit too far forward, you may tip forward. Sitting on the noodle like a bicycle you can:
- Bicycle travel forward
- Reverse bicycle travel backward
- Seated breaststroke and reverse breaststroke – arms and legs perform the same move
- Pelvic floor exercise – lift your pelvic floor off the noodle for 10 seconds
- Cross your ankles in front and row
- Rowing crew – partners position themselves one behind the other; the one in back puts the back end of her partner’s noodle between her knees; both partners row. This can be done with 3 or 4 people.
- Centipede – partners position themselves one behind the other; the one in back holds the end of her partner’s noodle with both hands; both partners bicycle. This can be done with 3 or more people.
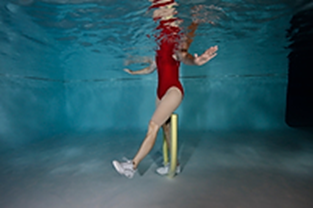
Stand with One Foot on the Noodle. In this position you can:
- Standing leg press for the quads and glutes
- Hip extension for the glutes – Don’t lift the foot too high or the noodle will slip off the foot.
- Balance with one foot lifted in front or extended to the back
- Cross-country ski or jumping jacks with one foot on the noodle for a balance challenge.
Stand with Both Feet on the Noodle. In this position you can:
- Use the noodle as a stair climber – alternate lifting one foot at a time
- Squat for hamstrings
- Reverse squat – from a squat position lift the feet to take the noodle off the floor and press it back down
- Surf – lift the feet to take the noodle off the floor and balance; add a breaststroke or a reverse breaststroke for even more of a challenge.

Partner Moves. Rowing crew and centipede are partner moves. Here are some other partner activities you can do just for fun:
- Partner cross-country ski – each partner holds one end of both noodles; push and pull the noodles while skiing. It takes coordination.
- Partner jumping jacks – each partner holds one end of both noodles and sweeps the ends out and in. This is another move for coordination.
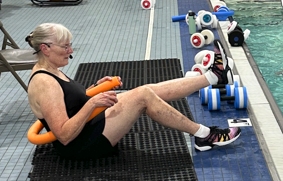
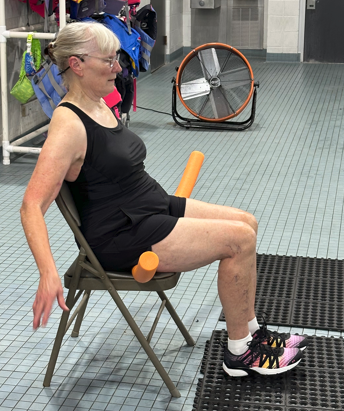
- Rickshaw – partners line up one behind the other with the noodles under their arms. The partner in front runs and the partner in back tucks her feet in a seated position to enjoy the ride (see the photo to the right)
- Partner bicycle – partners line up one behind the other. The partner in front wraps the noodle around her chest with the ends behind her; she becomes the handlebars. The partner in back sits on her noodle like a bicycle and holds the ends of her partners noodle. The partner in front runs and the one in back bicycles. In deep water, both partners bicycle.
Noodle Assisted Stretches.
- Hamstring stretch – the noodle is under the thigh
- Inner thigh stretch – Yoga Tree Pose with the noodle under the thigh
- Chest stretch – straddle the noodle, grab the back end of the noodle with both hands and push it under water
- Triceps stretch – straddle the noodle with the back end high, grasp that end with one hand keeping the elbow up
- Oblique stretch – lateral flexion holding the noodle overhead like a rainbow
You may know other things to do with noodles. Put your ideas in the comment box below. I’d love to hear them!
See you in the pool!

Chris Alexander


Leave a Reply