Christine Alexander is the author of 2 books on water exercise each published by Human Kinetics.
Water Fitness Progressions (2019) was written for water fitness instructors and aquatic personal trainers. It describes how to use periodization to help class participants and clients progress in their level of fitness. It contains lesson plans that illustrate how to progressively increase intensity for both cardiorespiratory endurance and strength training.
Water Fitness Lesson Plans and Choreography (2011) was written for water fitness instructors. It has 36 class ideas for shallow water exercise and 36 class ideas for deep water exercise. Individuals may find the exercise descriptions and photos useful for building a personal exercise routine.
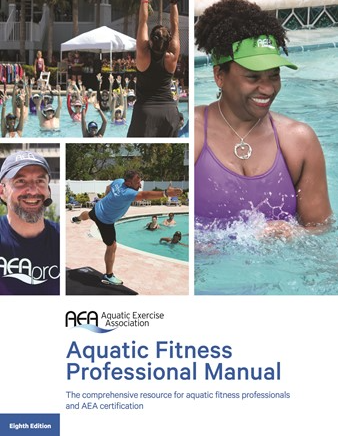
The question of whether water exercise can help improve bone mineral density has been a subject of research for at least two decades. The question arises because the buoyancy of the water decreases the effects of gravity and reduces weight bearing. A body immersed to the waist bears about 50% of its body weight. A body immersed to the chest bears approximately 25%-35% of its body weight. A body immersed to the neck bears about 10% of its body weight (Aquatic Exercise Association, Aquatic Fitness Professional Manual). Therefore, since water exercise is not effective weight bearing exercise, then it been dismissed as unlikely to be beneficial for people with osteoporosis. The problem with this line of reasoning is that it fails to take into account the other recommendation that people with low bone density also engage in strength training exercise. Bone remodeling is stimulated by muscle contractions and moderate skeletal loading. The aquatic environment provides resistance in all directions, promoting muscle strengthening and muscle balance. Leader Tools, an AEA publication for instructors who teach arthritis classes, notes that “In a systematic review and meta-analysis, Schinzel and colleagues (2023) reported statistically significant improvements in bone mineral density at key skeletal sites (both the lumbar spine and femoral neck).” Even with reduced joint loading, muscle activation and moderate skeletal stress still occur, helping to maintain and even improve bone density.
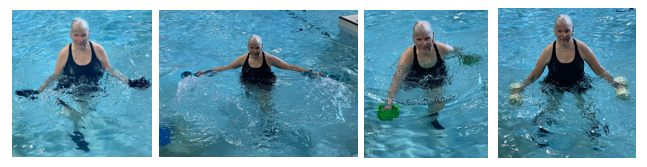
Low impact does not mean low intensity. One of the most effective ways to overload the muscles is to use acceleration, that is to push against the water’s resistance with force. Be intentional about it. Stabilize your core in good alignment, then move any upper or lower body joint through its full range of motion in any plane – sagittal, frontal or transverse – or in diagonals, pushing hard. Add more resistance with equipment. Drag equipment, such as webbed gloves, paddles and drag bells provide resistance in every direction. Foam dumbbells offer resistance, but mainly toward the pool floor. Click on the links for brief video demonstrations of each piece of equipment. Avoid exercises that cause spinal compression which may lead to fractures, such as crunches, waist twists and lateral flexion (or limit the range of motion).
It is important to note that it takes 6 months of consistent exercise to start seeing benefits. Being consistent and committed to a physical activity regimen contributes to bone health. The American College of Sports Medicine recommends at least 150 minutes of moderate exercise each week, and two or more sessions of strength training. You might wish to include other forms of exercise in your regimen, such as walking or strength training on land, both for variety and to meet these exercise recommendations.
If you have osteoporosis, a good resource for information is the Bone Buddies Osteoporosis Support Group. The General Programming page describes their programs, which include free exercise classes, monthly presentations on topics pertaining to osteoporosis, healthy eating sessions with a registered dietician, ask the pharmacist sessions, and sessions with a psychology educator. The exercise classes include tips on how to perform daily tasks without risking a fracture. All of the programs are on Zoom, so you can tune in from anywhere in the country. The Resources page includes links to Michael Lavacot’s very educational YouTube videos explaining osteoporosis and comparing medications, among other resources. The Events page has the Calendar with the dates of all the individual programs for the next year.
One of the risks for osteoporosis is age, and none of us can avoid that. It makes sense to remain active throughout your lifetime to minimize the risks and manage your low bone density if it occurs. See you in the pool!
Chris Alexander
One response to “Water Exercise and Osteoporosis”
Candace Dominick
Hi
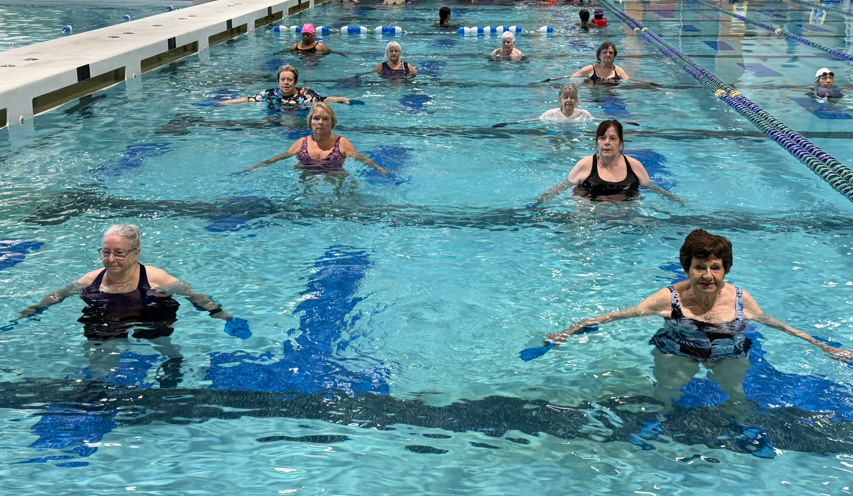
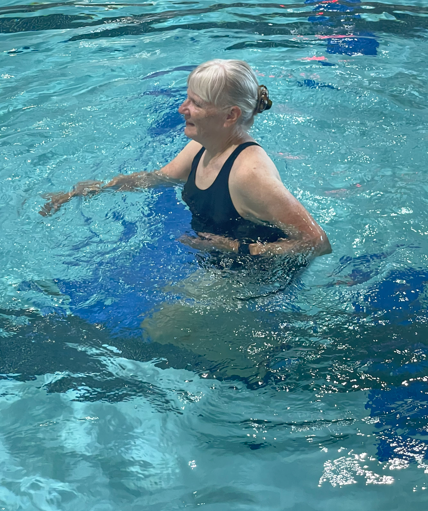
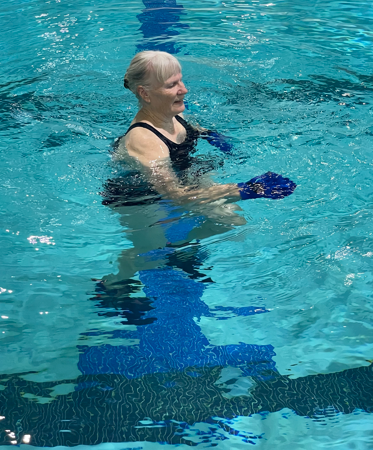
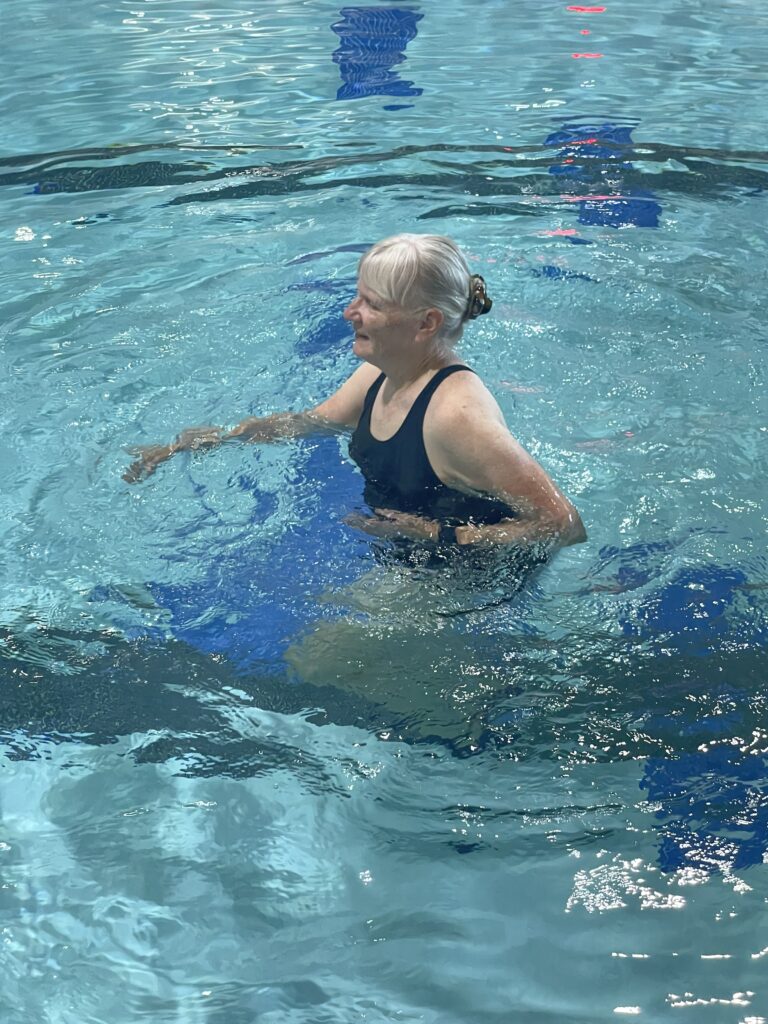
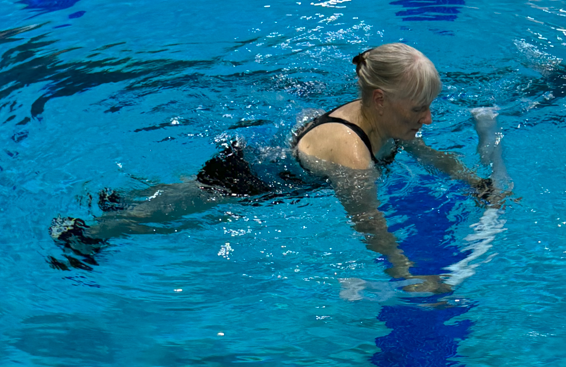
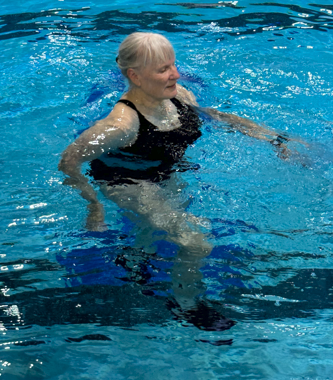
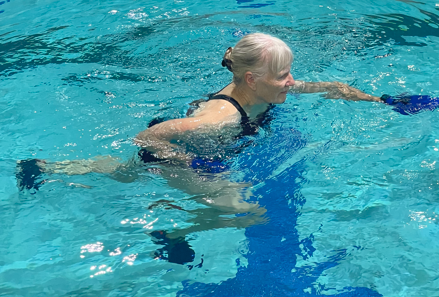
Good pictures of us doing aerobics with the paddles.
You are a great instructor. I get a really good work out.
Thanks
Which is better? There are differences in exercising in shallow water vs. deep water, but each has its own advantages.
Shallow Water. Nearly every pool that offers water fitness classes has shallow water, which is defined as a depth between mid-rib cage to mid-chest for most participants. This provides the benefits of both reduced impact and grounding forces that allow participants to maintain proper alignment and control. Shallow water provides resistance in every direction of submerged movement, which means both muscles in a muscle pair are trained. People who are limited because of impact concerns from land based training are able to exercise at an intensity to improve fitness. People at higher levels of fitness can train at higher intensities without experiencing increased musculoskeletal stress. Shallow water exercise burns calories comparable to land exercise. Wearing shoes provides traction and can allow for a more intense workout that burns more calories.
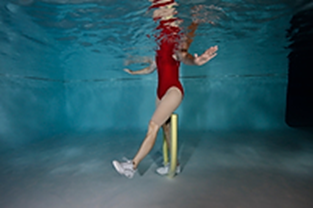
You can exercise at five impact levels in shallow water. Level I is performed in an upright position. Level II is performed by flexing the hips and knees to submerge the body to shoulder depth. Level III is performed without touching the pool bottom. Grounded movements are initiated in an upright position, but one foot remains in contact with the pool floor at all times. Propelled movement, or plyometrics, is jump training. People with osteoporosis can benefit from propelled movement because it involves some weight bearing. People with arthritis often find it more comfortable to exercise in water than on land because of the reduced impact.
You can train for cardiorespiratory fitness by increasing range of motion, increasing speed, and accelerating. You can train for strength by pushing against the water resistance or using equipment. You can train for core strength and balance by exercising on one foot or in other less stable positions, such as a tandem stance. Any kind of aquatic equipment can be used in shallow water. This includes buoyant equipment, such as foam dumbbells and noodles; drag equipment such as webbed gloves, Aqualogix bells, fins, paddles and Aqua Ohm; rubberized equipment such as bands and resistance tubing; aquatic steps; aqua poles; and aqua drum sticks.
Deep Water. Fewer pools have a deep end, but those that do have seen a growth in popularity of deep water classes. Deep water exercise is performed at a depth that allows the participant to remain vertical while not touching the pool floor. A flotation belt should be worn for neutral buoyancy, which allows the participant to concentrate on working against the drag properties of the water as opposed to trying to stay afloat. Participants can move freely in all three planes of motion, creating a total-body workout, muscle balance and a substantial challenge for the core muscles without impact stress to the joints. Heart rates in deep water are lower than on land or in shallow water because of heat dissipation, hydrostatic pressure and limited gravitational forces. Research shows that there is no difference in oxygen consumption in spite of the reduced heart rate. When comparing land and water exercises, similar exercises performed at the same intensity require greater caloric expenditure in deep water.
There are no impact levels in deep water because there is no impact. However you can exercise in various positions. Upright is similar to Level I. Seated, as if sitting in a chair, is similar to Level II. Elevating the body with a scull is similar to Level III. Single leg moves while keeping the other leg vertically extended is similar to Grounded movements. Accelerated moves that propel the body upward by using the limbs to apply force against the water is similar to propelled moves. In addition you can challenge the core with off-axis moves, such as leaning diagonally to the side or forward. People with osteoporosis are advised to include resistance training in their routine, and you can certainly perform that in deep water; however it is advisable to also include weight bearing exercise, such as walking, if possible. Arthritis classes are offered in the deep end for those who appreciate a completely non-impact workout.
You can train for cardiorespiratory fitness in deep water by increasing range of motion, increasing speed, and accelerating. You can train for strength by pushing against the water resistance or using equipment. Maintaining neutral alignment works the core for the entire class period. Not all kinds of aquatic equipment are appropriate for deep water. The equipment must float if you don’t want to dive down to the bottom of the pool to retrieve a piece of equipment someone dropped. Buoyant equipment, such as foam dumbbells and noodles, and drag equipment that attaches to the body, such as webbed gloves and swim fins, work well. Drag equipment that floats, such as Aqualogix bells, and rubberized equipment can also be used. Aquatic steps; aqua poles; and aqua drum sticks can only be used in shallow water.
Conclusion. It comes down to personal preference. Some people prefer to have their feet on the ground/pool floor. Some prefer the freedom of movement in the deep end. There is no right or wrong answer. For more information about shallow water and deep water exercise, see the AEA Aquatic Fitness Professional Manual. For lesson plans for both shallow and deep water see my book Water Fitness Progressions.
Travel in a water fitness class increases the intensity of the exercise. The friction between the molecules of water cause the molecules to adhere to each other and to a submerged body (you). This friction causes resistance to motion. We call this drag resistance. Drag creates constant muscle loading with every movement and in every direction. Travel causes additional resistance which increases muscular effort, causing greater energy expenditures and therefore higher caloric expenditure. You can travel with many exercises. Jogging is what normally comes first to mind.
The arm movements you use while jogging can assist or resist your forward movement. Crawl stroke, row, breaststroke, double-arm press-down (shoulder extension), arm swing with the palms facing back, triceps kick back, and rotator cuff sweep out, all assist travel by helping to sweep the water to the back. Those same arm movements resist backward travel. Pushing forward with your palms, reverse breaststroke, arm scoops up (shoulder flexion), arm swing with the palms facing forward, biceps curl and rotator cuff sweep in, all resist forward travel and assist backward travel.
You can of course use other leg movements while traveling, and these can also assist or resist movement. Heel jog, kick backward, and rocking horse all assist forward movement. It is harder to travel backward with these movements. Kick forward assists backward movement and resists forward movement. In cross-country ski, the legs move both forward and backward, which resists both forward and backward movement. Leg movements in the frontal plane (out to the sides) increase the surface area of your body. That causes resistance to both forward and backward movement. Examples are wide leg jog, jumping jacks and kick side to side.
You can alter the resistance by using arm and leg moves which both assist travel, or both resist travel. An example of both moves assisting forward travel is kick backward with crawl stroke and an example of both moves assisting backward travel is kick forward with reverse breaststroke. In kick forward with arm scoops up, both legs and arms resist forward travel. In rocking horse with biceps curl, both legs and arms resist backward travel. You can use an arm move that assists travel with a leg move that resists travel, and the opposite, an arm move that resists travel with a leg move that assists travel. Try forward travel with jumping jacks and breaststroke, or backward travel with heel jog while pushing forward.
Another way to increase the intensity of your travel by adding acceleration. Acceleration involves both pushing off the pool floor to propel yourself forward or backward and using more force against the water’s resistance. Propelled moves include hopping (landing on both feet), and leaping (landing on one foot). Travel backward by pushing off the pool floor, tucking and landing on both feet. To use more force against the water’s resistance, try power running with high knees, cupped hands, and pumping arms that pull the water hard. Lift one knee, straighten the leg and power press it back while traveling backward. Another idea is to create turbulence with fast arm movements while running in a scatter pattern around the pool.
You can use travel to work on balance. Take 3 steps, lift one knee and pause. Walk with one foot in front of the other as if on a tightrope. In a crossover walk you step with your right foot crossing the midline then your left foot crossing the midline. Slow walking is a great balance challenge. Travel slow, slower and so slow you are barely moving.
Let me know if you have a favorite way to travel in your water fitness class.
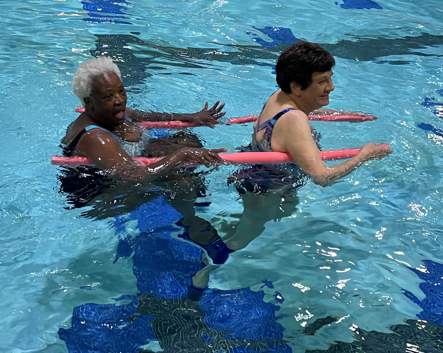
I have visited many aquatic centers and all of them have noodles. Noodles are affordable and versatile – it is amazing how many things you can do with noodles! You can use them for upper body strength training, lower body strength training, core strength training and balance. And they are just plain fun to use! This article is not an exhaustive list of all the things you can do with noodles, but perhaps there are a few here that you may not be familiar with.
Hold the Noodle in Your Hands. When you hold the noodle in your hands, you want your hands to be shoulder distance apart. If the hands are too narrow, the shoulders are rounded. If the hands are too wide, the shoulder blades are out of neutral. In this position you can:
Push down in front for the shoulders
Row for the upper back
Do a triceps extension
Push forward for the chest and triceps
Push ups for the chest – in a lunge position, a plank position, or suspended
Yoga plank for core strength and stability
Plank scissors – lift one leg toward the surface of the water and lower
Fall forward, tuck and stand up for core strength and fall recovery
Burpees – from a plank position, hop into a squat, jump up, squat and hop back into a plank position. In deep water you would flutter kick with elevation instead of jumping up. Click Burpees for a video demonstration.
Hold the Noodle Like a Rainbow. In this position you can:
Push and pull the ends with cross-country ski, for the chest, triceps and upper back
Touch the ends together with jumping jacks for the chest
Hold the ends together and press the noodle under water for the lats and shoulders
Hold the Noodle with One Hand. In this position you can:
Swing the arm with cross-country ski for the shoulders
Lat pull down with jumping jacks for the lats
Plunge down at the side for triceps
Yoga side plank for core strength and stability
Side Plank Pliers – lift the top leg toward the surface of the water and lower
Side fall, tuck and stand up for core strength and fall recovery. Practice turning to fall forward since falling sideways on land can lead to hip fractures while falling forward and landing on forearms is safer.
Wrap the Noodle around Your Waist. In this position you can:
Perform a rotator cuff sweep
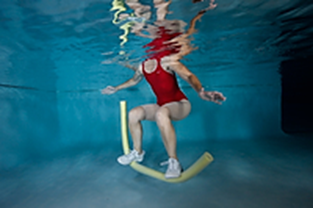
Wrap the Noodle around Your Back. This is a stable position for suspended moves. You want to position the noodle mid-torso, just below the shoulder blades. The noodle can cause shoulder impingement if it is right under the arms and potentially damage the nerves in the armpits. Place your hands on the ends of the noodle to keep it below the shoulder blades. In this position you can do:
Suspended kicks for the quads and hamstrings
Suspended jacks for the inner and outer thigh
Bicycle for multiple leg muscles
Waist twist for the obliques
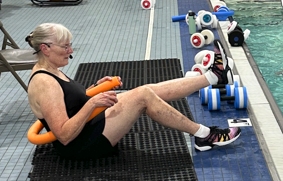
Pilates Single Leg Stretch for the core – Bend one knee and lift the opposite leg (see photo above)
Flex one foot and lower it towards the floor, point the toes and lift it back toward the surface for core strength
Stretch the arms out to the sides and go into a side-lying position. In this position you can do side-lying cross-country ski, side-lying bicycle, side-lying bicycle in a circle, and side-lying bicycle reverse pedal in a circle.
Sit on a Noodle Like a Swing. In this position you can perform many of the same moves as with the noodle around your back, but it is more of a challenge to balance. In addition to kicks, jacks and bicycle, here are some other things to try:
Mermaid – unison kick, like pumping your legs in a swing
Bicycle with one leg
Kick one leg across and sweep it out to the side
Extend the legs and point and flex the feet
Hip hike for the obliques
Brace the core with arms down at the sides and make turbulent hand movements
Sit on the Noodle Like a Bicycle. Be sure to sit in the center of the noodle, If you sit too far back, the noodle will be in your face and you may tip backwards. If you sit too far forward, you may tip forward. Sitting on the noodle like a bicycle you can:
Bicycle travel forward
Reverse bicycle travel backward
Seated breaststroke and reverse breaststroke – arms and legs perform the same move
Pelvic floor exercise – lift your pelvic floor off the noodle for 10 seconds
Cross your ankles in front and row
Rowing crew – partners position themselves one behind the other; the one in back puts the back end of her partner’s noodle between her knees; both partners row. This can be done with 3 or 4 people.
Centipede – partners position themselves one behind the other; the one in back holds the end of her partner’s noodle with both hands; both partners bicycle. This can be done with 3 or more people.
Stand with One Foot on the Noodle. In this position you can:
Standing leg press for the quads and glutes
Hip extension for the glutes – Don’t lift the foot too high or the noodle will slip off the foot.
Balance with one foot lifted in front or extended to the back
Cross-country ski or jumping jacks with one foot on the noodle for a balance challenge.
Stand with Both Feet on the Noodle. In this position you can:
Use the noodle as a stair climber – alternate lifting one foot at a time
Squat for hamstrings
Reverse squat – from a squat position lift the feet to take the noodle off the floor and press it back down
Surf – lift the feet to take the noodle off the floor and balance; add a breaststroke or a reverse breaststroke for even more of a challenge.
Partner Moves. Rowing crew and centipede are partner moves. Here are some other partner activities you can do just for fun:
Partner cross-country ski – each partner holds one end of both noodles; push and pull the noodles while skiing. It takes coordination.
Partner jumping jacks – each partner holds one end of both noodles and sweeps the ends out and in. This is another move for coordination.
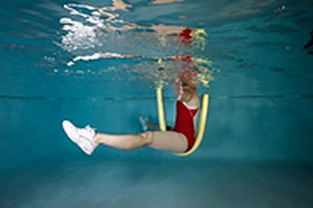
Rickshaw – partners line up one behind the other with the noodles under their arms. The partner in front runs and the partner in back tucks her feet in a seated position to enjoy the ride (see the photo to the right)
Partner bicycle – partners line up one behind the other. The partner in front wraps the noodle around her chest with the ends behind her; she becomes the handlebars. The partner in back sits on her noodle like a bicycle and holds the ends of her partners noodle. The partner in front runs and the one in back bicycles. In deep water, both partners bicycle.
Noodle Assisted Stretches.
Hamstring stretch – the noodle is under the thigh
Inner thigh stretch – Yoga Tree Pose with the noodle under the thigh
Chest stretch – straddle the noodle, grab the back end of the noodle with both hands and push it under water
Triceps stretch – straddle the noodle with the back end high, grasp that end with one hand keeping the elbow up
Oblique stretch – lateral flexion holding the noodle overhead like a rainbow
You may know other things to do with noodles. Put your ideas in the comment box below. I’d love to hear them!
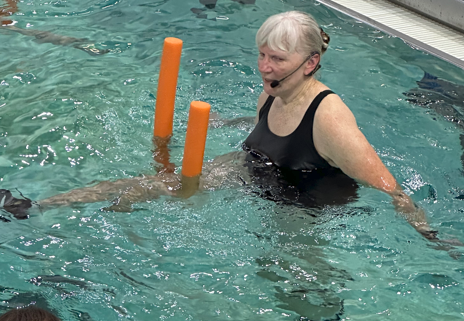
If you want a great workout in the pool, you can’t do better than deep water running. More research has been done on deep water running than on any other form of water exercise. Improvements in cardiorespiratory endurance and high calorie expenditure are well documented benefits. Deep water running can be practiced by everyone from elite athletes to water fitness class participants. Like every type of exercise, it should be performed with good form. That means that the spine is in neutral alignment, you are using a knee up/foot down motion, your shoulders are flexing and extending, your elbows stay bent and you are pulling them back so that your hand reaches your hips, your chest is erect, your shoulders are relaxed, your chin is level, and you are looking forward. In this position you are able to fully expand the lungs allowing your working muscles to get the oxygen they need. Click on Correct Form to see a video demonstration.
There are however some common mistakes in deep water running. The mistake I see most often is leaning forward, as in the photo on the right. In this position the water hits the chest first and slides down the torso, removing most of the resistance, and therefore most of the intensity. In addition, the position causes spinal compression, which means that the front edges of the vertebrae are touching. This can cause microfractures in someone with osteoporosis. There are also some common mistakes with the arm movement. These mistakes include swinging the arms across the chest, flexing and extending at the elbows, and not bringing the elbows back far enough. The shoulders should remain stationary, and not rock forward and back. The head should also remain level, and not rock from side to side. Click on Common Mistakes to see a video demonstration.
You can combine deep water running with assisting and resisting arm patterns to add muscular endurance training for the upper body. Some examples are (1) Crawl stroke, an alternating reach and pull motion; keep the arms under water where the resistance is. (2) Row, which is reaching and pulling with both arms together. (3) Double-arm press-down, which means stretching both arms out in front and pressing them down. (4) Breaststroke, which should be performed with the thumbs up to avoid combining internal rotation and horizontal abduction, a movement that is hard on the rotator cuff. (5) Rotator cuff sweep, which means keeping the elbows down near the waist and sweeping the hands out with the thumbs up. For more information on upper body exercises with deep water running, see Craig Stuart’s article “Wave Run” in the January-February-March 2026 issue of Akwa Magazine. Click on Upper Body Exercises with Deep Water Running for a video demonstration.
Deep water running can be performed at several intensity levels, depending on your goals. The basic deep water run is perfect for a water fitness class. Take it to a sprint if you wish to work harder or you are training for a 5k run. A power run is more intense, and can be used for intervals. Click on Increase Intensity for a video demonstration.
Although you do not run backward in daily life, traveling backward in the water is a good way to strengthen the back. For that reason I like to include some backward travel when I am doing a deep water running class. Again, good form is important. Participants frequently let their legs float up so that they are in a seated or semi-reclining position. This takes a lot of resistance out of the exercise, and the spine out of alignment, causing the spinal compression we wish to avoid. With the feet under the body, use a scull, a push forward or a reverse breaststroke to travel backward. Click on Travel Backward for a video demonstration.
I love deep water running. Try it out and you may love it too. See you in the pool!


Leave a Reply