Water Exercise and Osteoporosis

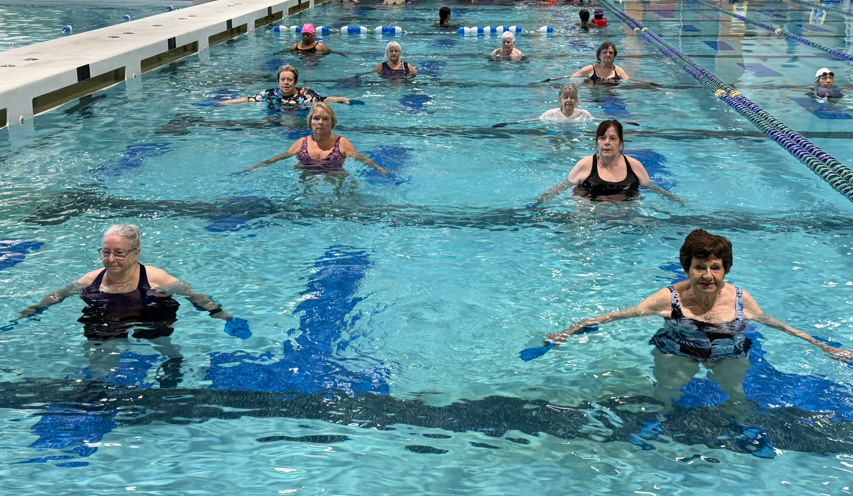
The question of whether water exercise can help improve bone mineral density has been a subject of research for at least two decades. The question arises because the buoyancy of the water decreases the effects of gravity and reduces weight bearing. A body immersed to the waist bears about 50% of its body weight. A body immersed to the chest bears approximately 25%-35% of its body weight. A body immersed to the neck bears about 10% of its body weight (Aquatic Exercise Association, Aquatic Fitness Professional Manual). Therefore, since water exercise is not effective weight bearing exercise, then it been dismissed as unlikely to be beneficial for people with osteoporosis. The problem with this line of reasoning is that it fails to take into account the other recommendation that people with low bone density also engage in strength training exercise. Bone remodeling is stimulated by muscle contractions and moderate skeletal loading. The aquatic environment provides resistance in all directions, promoting muscle strengthening and muscle balance. Leader Tools, an AEA publication for instructors who teach arthritis classes, notes that “In a systematic review and meta-analysis, Schinzel and colleagues (2023) reported statistically significant improvements in bone mineral density at key skeletal sites (both the lumbar spine and femoral neck).” Even with reduced joint loading, muscle activation and moderate skeletal stress still occur, helping to maintain and even improve bone density.

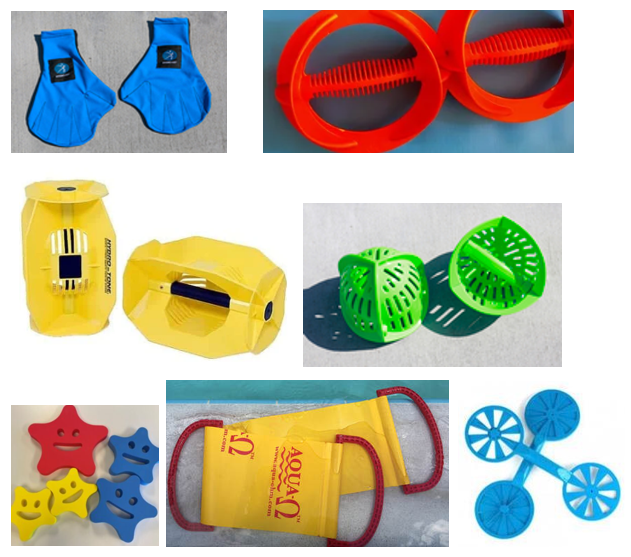
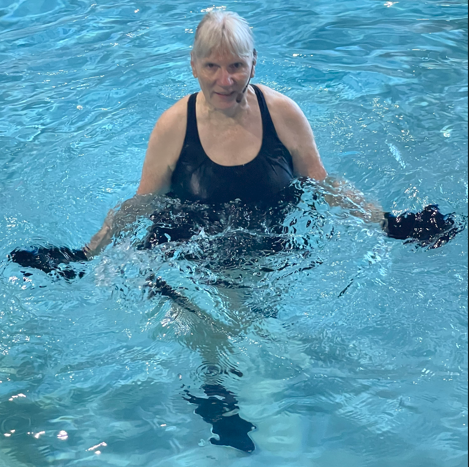
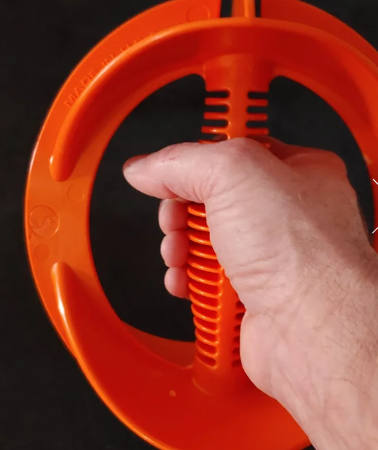
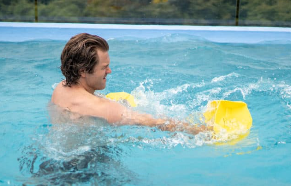
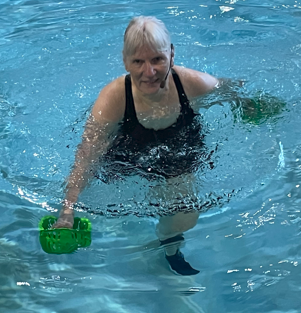
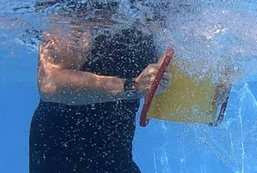
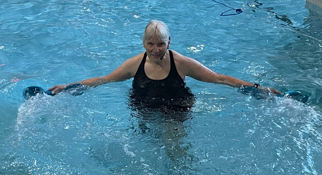
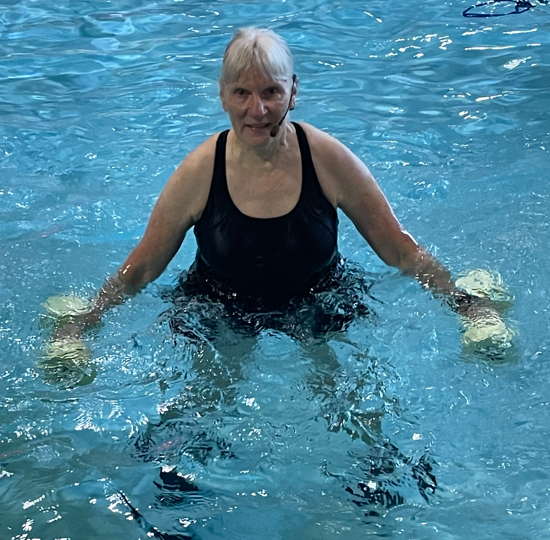
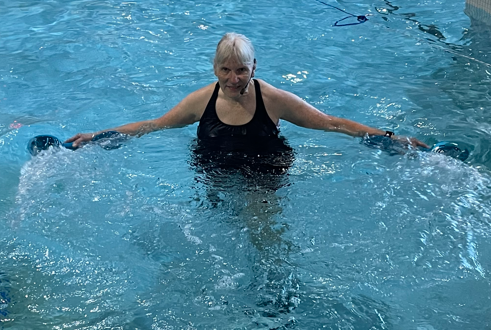
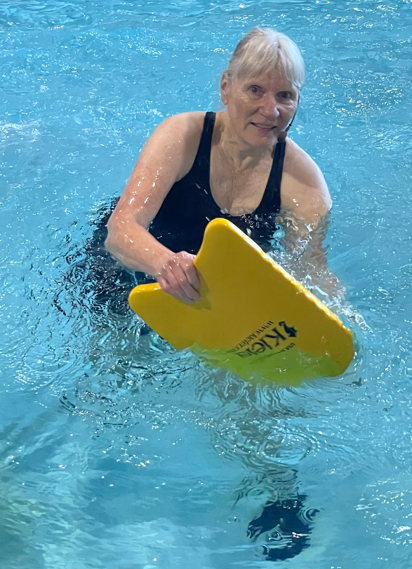
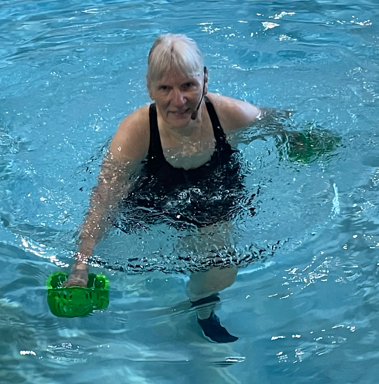
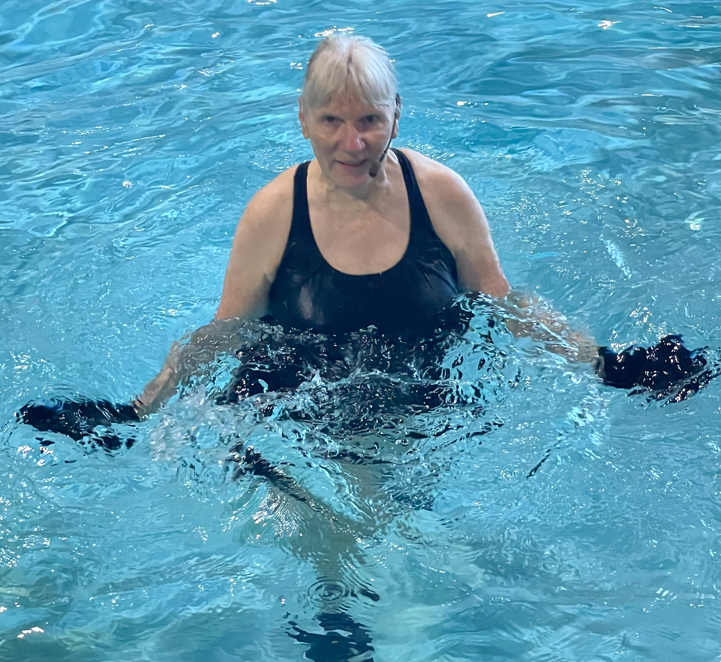
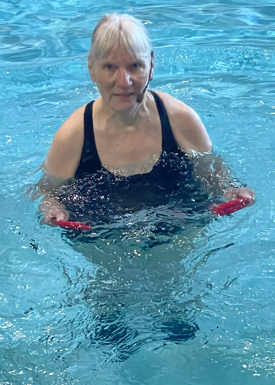
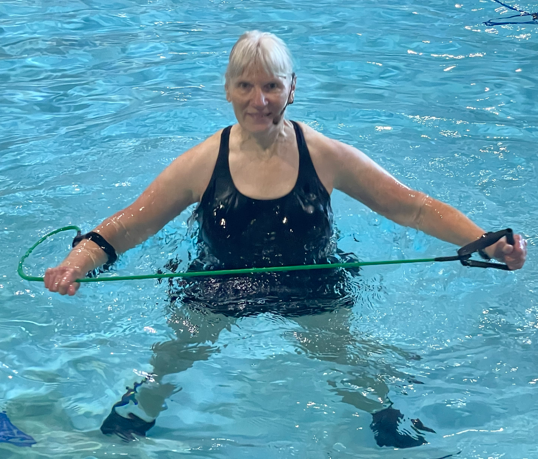
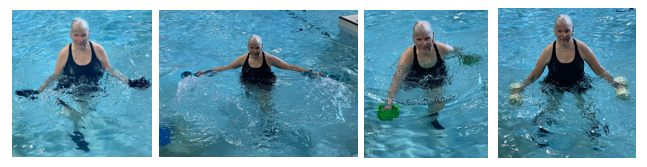
Low impact does not mean low intensity. One of the most effective ways to overload the muscles is to use acceleration, that is to push against the water’s resistance with force. Be intentional about it. Stabilize your core in good alignment, then move any upper or lower body joint through its full range of motion in any plane – sagittal, frontal or transverse – or in diagonals, pushing hard. Add more resistance with equipment. Drag equipment, such as webbed gloves, paddles and drag bells provide resistance in every direction. Foam dumbbells offer resistance, but mainly toward the pool floor. Click on the links for brief video demonstrations of each piece of equipment. Avoid exercises that cause spinal compression which may lead to fractures, such as crunches, waist twists and lateral flexion (or limit the range of motion).
It is important to note that it takes 6 months of consistent exercise to start seeing benefits. Being consistent and committed to a physical activity regimen contributes to bone health. The American College of Sports Medicine recommends at least 150 minutes of moderate exercise each week, and two or more sessions of strength training. You might wish to include other forms of exercise in your regimen, such as walking or strength training on land, both for variety and to meet these exercise recommendations.
If you have osteoporosis, a good resource for information is the Bone Buddies Osteoporosis Support Group. The General Programming page describes their programs, which include free exercise classes, monthly presentations on topics pertaining to osteoporosis, healthy eating sessions with a registered dietician, ask the pharmacist sessions, and sessions with a psychology educator. The exercise classes include tips on how to perform daily tasks without risking a fracture. All of the programs are on Zoom, so you can tune in from anywhere in the country. The Resources page includes links to Michael Lavacot’s very educational YouTube videos explaining osteoporosis and comparing medications, among other resources. The Events page has the Calendar with the dates of all the individual programs for the next year.

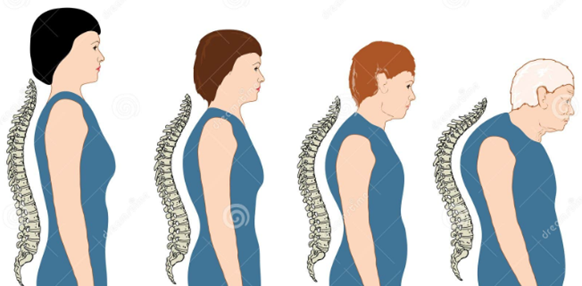
One of the risks for osteoporosis is age, and none of us can avoid that. It makes sense to remain active throughout your lifetime to minimize the risks and manage your low bone density if it occurs. See you in the pool!
Author/Instructor Photo

Chris Alexander

One response to “Water Exercise and Osteoporosis”

  1. Candace Dominick Avatar
    Candace Dominick

    Hi
    Good pictures of us doing aerobics with the paddles.
    You are a great instructor. I get a really good work out.
    Thanks

Leave a Reply

Your email address will not be published. Required fields are marked *

Pool Equipment: Drag Equipment

Drag equipment comes in all sizes, shapes and colors. Drag is the resistance you feel to movement in the water. There is friction between the water molecules (viscosity) causing them to adhere to each other. This friction causes resistance to motion. Sweep your hand through the water, and that resistance you feel is drag. You can increase the amount of drag by increasing your speed of movement or by increasing the surface area of your hand. Do this by spreading the fingers slightly and make your palms face the direction of motion. Drag equipment increases the surface area even more. If the surface of your drag equipment has bumps, edges, fins or other irregularities, these create eddies, or currents that move in directions different from the current you are creating by the direction of your movement. Turbulence is created when the eddies become chaotic. Drag, eddies and turbulence all increase resistance and can effectively provide overload to improve muscular strength and endurance.

The muscles of the human body are primarily organized in pairs. When one muscle of the pair (the prime mover) contracts or shortens, the opposite muscle lengthens or stretches. When you return to your starting position, the opposing muscle contracts and becomes the prime mover, while the opposite muscle stretches. When you use drag equipment you are providing resistance to the muscle that is contracting. You do not have to get into any special positions to work both muscles because, unlike buoyant equipment, drag equipment provides resistance in every direction. There is resistance moving the equipment down toward the pool floor, lifting it up toward the surface of the water, sweeping it from side to side, moving it in diagonal patterns, and rotating it in circles. You can target every muscle group with drag equipment. That is why I am a big fan of drag equipment.

Here are a few examples of drag equipment, where to buy them, and a short video demonstration of an exercise using the equipment:

Webbed gloves. Webbed gloves are the easiest piece of drag equipment to use. Just slip them on and start your workout. The resistance is light enough that you can use webbed gloves for an entire class without risking an injury. Webbed gloves can be used in both shallow and deep water. Many of my participants bring their own gloves to class. Hydro-Fit gloves cost $19.95 a pair. Click on rotator cuff sweep for a video demonstration of one exercise using webbed gloves.

Boqs. Boqs are a brand new piece of drag equipment. They are advertised as omnidirectional, resistive aquatic exercise equipment that is big enough to create more and more resistance the faster you use them – challenging every major muscle group in your body. You can use them in shallow or deep water, which I presume means that they float. I have not seen them nor had an opportunity to test them out, but they look interesting. A pair costs $44.99. They are so new that no video demonstrations are yet available.

Hydro-Tone hydro bells. Hydro-tone bells have been around for a long time. They are large with multiple surfaces, fins and openings which create a lot of turbulence. They offer a lot of resistance. By doubling your speed of movement you can quadruple the resistance. All that resistance makes them popular with athletes. They can be used in shallow water, but you cannot create enough stability to handle that much resistance in deep water. A pair costs $79.95 on the Hydro-Tone website. Click on push-pull for a video demonstration of one exercise using Hydro-Tone hydro bells.

Aqualogix Training Bells. Aqualogix bells have three surfaces, fins and openings to create turbulence. There is a handle on the inside, and if you hold it one way, the fin is on the bottom and a flat surface is on the top, creating a larger surface area and more resistance for forward and upward moves. Hold the handle the other way and the fin is on top with the flat surface on the bottom, creating more resistance for backward and downward moves. They come in three sizes, low, medium and high resistance. I love my low resistance Aqualogix bells, and have used them with my participants in circuit classes. They float and the equipment is suitable for deep water as well as shallow. They are sold for $74.95 a pair by Hydro Revolution. Click on cross-country ski for a video demonstration of one exercise using Aqualogix training bells.

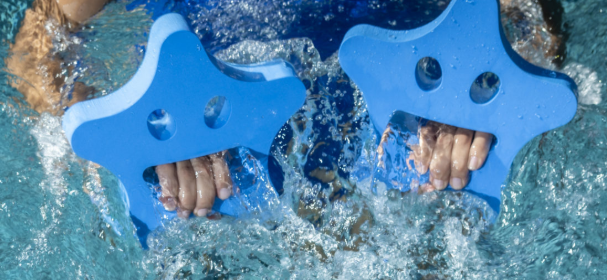
Liquid Stars. Liquid stars are buoyant equipment that can be used like drag equipment. They are a fun piece of equipment with a smiley face in the middle. You can put your fingers through the smile or put a finger through each eye hole. The yellow small stars and blue medium stars are sold as pairs. The red large star is the size of a small kickboard and is sold as a single. You can use them in shallow or deep water. They are sold by Indigo Aquatics for $26 for a pair of small stars, $30 for a medium pair, and $25 for a large one. Click on suspended push for a video demonstration of one exercise using liquid stars.

Aqua Ohm. The Aqua Ohm was created by a licensed physical therapist who wanted a piece of drag equipment that could be used for both upper body and lower body. It is made of a flexible flat surface with three handles. Two handles are fixed on the ends. The third handle is movable and can be used to adjust the length of the equipment. The website has a lot of information about how to use it. My shallow water class enjoys using the Aqua Ohm. Since it does not float, it is not appropriate for deep water. It costs $36.95 on the Aqua Ohm website. Click on biceps curl for a video demonstration of one exercise using an Aqua Ohm.

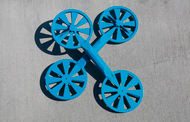
AquaFlex Paddle Water Fans. Paddles have a handle with a round fan on each end. The fans have adjustable blades that you can fully open for the least resistance or fully close for the most resistance. You can also adjust them to be partially open. I have been using them successfully with my shallow water class for years. Since they do not float, they cannot be used in deep water. You can get them from Theraquatics for $32.99 for a pair. Click on chest fly for a video demonstration of one exercise using AquaFlex paddle water fans.

This list of drag equipment is not exhaustive, but it gives you an idea of the variety that is available. Like any piece of equipment used in the pool, consider the safety of your participants. Choose a size that offers overload for strength training but is not so large that good form is compromised. Use the equipment for a section of your class, or alternate drag equipment sets with sets using no equipment to avoid overtaxing your shoulder stabilizers. Water Fitness Progressions has strength training lesson plans for webbed gloves, paddles, and drag bells, as well as circuit classes using them.

Let me know what your favorite kind of drag equipment is in the comment section below. See you in the pool!

Author/Instructor Photo

Chris Alexander

Leave a Reply

Your email address will not be published. Required fields are marked *

What Muscles Need Strengthening?

muscles of the upper body posterior - ModernHeal.com

The quick answer to the question is: strengthen the muscles that are used the least. Most of those muscles are on the back (posterior) side of our body because the movements we make are usually in front (anterior) where we can see what we are doing. The muscles of our joints are primarily organized in pairs. One muscle bends (flexes) the joint, its pair straightens (extends) the joint. The muscle in front usually does the flexion. The muscle in back usually does the extension. The exception is the knee joint, where the muscle in back does the flexion and the muscle in front does the extension. When one of the muscles contracts, its muscle pair is stretched. You can easily see that if we are contracting the muscles in front more often, then they become stronger than the muscles in back that get stretched more often. The main muscle pairs are:

  • Anterior deltoid and posterior deltoid – front and back of the shoulder joint
  • Biceps and triceps – front and back of the elbow joint
  • Rectus abdominis (abs) and erector spinae – front and back of the lumbar spine (the erector spinae is not labeled in the picture above because it is underneath the other muscles of the back)
  • Iliopsoas (hip flexors) and gluteus maximus – front and back of the hip joint (the iliopsoas is not labeled in the picture because it is a deep muscle on the front of the hip)
  • Hip adductors (inner thigh) and abductors (outer thigh) – inside and outside of the hip joint (the adductors are not labeled)
  • Quadriceps and hamstrings – front and back of the hip joint and the knee joint
  • Tibialis anterior (shin) and gastrocnemius (calf) – front and back of the ankle joint

In a water fitness class we can exercise the posterior deltoid by doing a breaststroke or an arm swing with emphasis on swinging to the back. We can exercise the triceps by pressing the water down toward the floor. We can exercise the erector spinae by traveling backward. We can exercise the gluteus maximus with a skate kick (a straight leg kick to the back) and with cross-country ski emphasizing the backward motion. We can exercise the abductors with wide leg jog, kicks side to side and jumping jacks, emphasizing the motion out to the side. We can exercise the hamstrings with heel jog (hamstring curls) and skateboard. The tibialis anterior is weaker than the gastrocnemius; we exercise the shins in the pool when we do knee lifts or jog with the feet flexed because we are lifting water with the top of the foot every time we lift the knee.

Another muscle group that needs strengthening is the trapezius, rhomboids and latissimus dorsi (lats). The rhomboids are not shown because they are in the center of the upper back beneath the trapezius. These muscles are important for posture. As we age, we tend to get rounded shoulders and our head falls forward. We can avoid some of this by keeping those postural muscles strong. Exercise the trapezius and rhomboids with a shoulder blade squeeze, upright row and crawl stroke. Exercise the latissimus dorsi with a lat pull-down (jumping jacks arms) emphasizing the downward motion and by touching the palms (or finger tips) behind the back.

Although it is typical to exercise all the muscles in an aquatic strength training class, it is a good idea to sometimes focus more on the muscles that need strengthening. Afterwards you may want to stretch the stronger muscles which tend to be tighter since they don’t get stretched as much, particularly the hip flexors, inner thigh, quadriceps and calf muscles.

It is very difficult to find a good clip art picture that clearly shows all the muscles. If you are interested in learning more about the muscles, go to pages 25-36 in the AEA Aquatic Fitness Professional Manual, or find a good anatomy book. There is more information about aquatic strength training, including lesson plans, in my book Water Fitness Progressions.

See you in the pool!

Author/Instructor Photo
Chris Alexander

← Back

Thank you for your response. ✨

Strength Training Equipment for the Pool

When people think of water fitness, they most often think of a cardio workout. While that is emphatically true, it is also possible to strength train in the pool. You don’t even need equipment. You can use the water’s resistance and the same principles for increasing intensity that you use for aerobic exercise. Once you have mastered that, adding equipment increases the resistance. Since most of the popular equipment made for use in the pool is hand-held, the targeted muscles are in the upper body:

  • Chest (Pectoralis major) – Chest fly/clap hands
  • Upper back (Trapezius) – Row
  • Side back (Latissimus dorsi) – Lat pull-down
  • Shoulders (Front and rear deltoids) – Arm swing
  • Shoulders and mid back (Rear deltoids and rhomboids) – Rear delt fly
  • Shoulders (Middle deltoids) – Arm lift to the sides
  • Rotator cuff – Shoulder medial rotation/rotator cuff sweep
  • Biceps – Arm curl
  • Triceps – Elbow extension

Increase the Range of Motion. Start by selecting your targeted muscle group, and moving your arms through their full, pain-free, range of motion. Notice how the water moves as your arms move.

Add Speed. Next increase your speed while continuing to move through your full range of motion. Your movement becomes harder. It’s easy to start slowing down, so pay attention to what you are doing.

Add Acceleration. Finally push harder against the water’s resistance. The harder you push against the water, the harder the water pushes back. You may notice that even though you are pushing harder, your movements are slowing down. When you get used to using acceleration, it is time to add equipment.

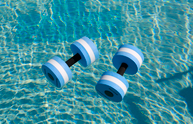
Buoyant Equipment. Nearly every pool facility has foam dumbbells in their equipment closet. Foam dumbbells were the first type of equipment specifically created for use in the pool. Buoyant equipment floats, therefore, the resistance comes from pushing the dumbbells down toward the pool floor. They are great for targeting the latissimus dorsi (as in the photo above) and the triceps. From a lunge position, if you lean forward 45 degrees with your spine in alignment, you can target the pectorals by pushing a chest fly toward the pool floor. Movements parallel to the floor, such as a row, an arm swing, a rear delt fly, and a rotator cuff sweep, create drag resistance, but the shoulder stabilizers must contract to hold the equipment under water. It is best to limit the number of reps for these exercises or avoid them if you cannot maintain good shoulder alignment. Movements toward the surface of the water, such as an arm lift to the sides or an arm curl, are assisted by buoyancy.

Drag Equipment. A variety of drag equipment is available. These increase the resistance of the water by increasing the surface area. Paddles have holes that allow water to flow through. Drag bells have multiple surface areas that create turbulence.

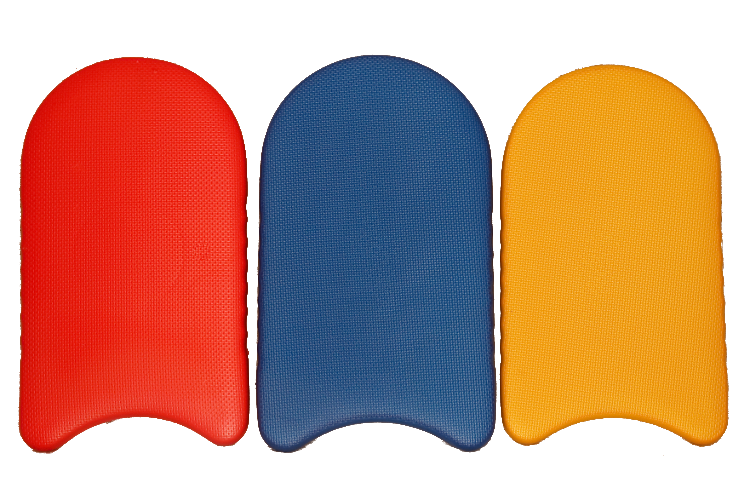
Drag equipment is not buoyant, and the resistance is in all directions – toward the pool floor, parallel to the pool floor, toward the surface of the water, and at any other angle. Drag equipment can be used to target any of the upper body muscle groups. Examples include a chest fly with paddles, a row with a kickboard, an arm swing with drag bells, a rotator cuff sweep with webbed gloves, and an arm curl with an Aqua Ohm, as in the photos above.

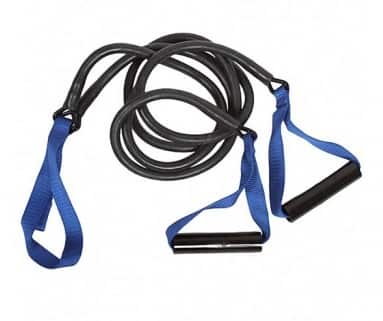
Rubberized Equipment. Resistance tubing and bands that are chlorine resistant have come on the market in the past several years. They work the same as rubberized equipment on land. There has to be an anchor point and the resistance is in pulling away from the anchor point. You can use a pool ladder as an anchor point, but that is impractical in a group exercise setting. The anchor point is usually one of your hands, or you can place the band behind your back, or from a seated position put it under your thighs, and then pull with both arms. Resistance tubing is too long to be able to hold a handle in each hand for most people. Try using one handle as the anchor point, then putting the other hand on the appropriate length of tubing. You can slip your wrist through the loose handle to keep it from flopping around in the water, as in the photo to the left of a rear delt fly.

Once you are comfortable with the equipment you can continue to increase the intensity by increasing the range of motion, adding speed, or adding acceleration, that is, by pushing or pulling harder. You can move up to a larger size foam dumbbell or drag bell, or a thicker resistance tube. You can hold a shorter length of rubberized equipment. You can close the holes on the paddles. You can use different pieces of equipment at different times to prevent your muscles from getting used to one type. Click on the name of each piece of equipment for a link to 10-second video of an exercise using that equipment. For strength training lesson plans both without and with equipment, see Water Fitness Progressions.

Let the pool be your all-purpose gym for both aerobic exercise and strength training. See you there!

Author/Instructor Photo
Chris Alexander

Fall Prevention

Risk Falling Fall prevention Slip and fall Wet floor sign, Lorm Ipsum ...

September is Fall Prevention Awareness month. It is estimated that one in four Americans over the age of 65 will fall every year. Falls not only can be life threatening, but they are associated with poor health outcomes and a sense of fear that can hinder independence, activity and strength in older adults. Therefore preventing falls in the first place is important. The Mayo Clinic offers the following tips for preventing falls:

  • Review your medications with your doctor. Some drug interactions may increase your risk of falling.
  • Exercise to improve strength, balance, coordination and flexibility.
  • Wear sensible shoes. Shoes like high heels and floppy slippers can contribute to a fall.
  • Remove tripping hazards from walkways in your home.
  • Secure loose rugs with double-sided tape or remove loose rugs entirely..
  • Clean up spills immediately.
  • Make sure there is adequate light in your living spaces so you can see where you are going.
  • Turn on the lights before going downstairs.

In addition to these tips for the home, aquatic fitness instructors can help with fall prevention by including some of the following exercises in their classes:

  • Gait training. People who are afraid of falling, perhaps because of a previous fall, tend to shorten their stride and look down at the floor. The hydrostatic pressure of the water supports the body and reduces the fear of falling, so a water exercise class is the perfect place for gait training. Walking is a good warm up at the beginning of class, or cool down at the end of class. Walk forward, backward and sideways. Include starts and stops. Try slow motion walking, or walk without moving the head or torso. Try walking with hands on hips to remove stabilizing arm movements. Change the tempo by walking slow for a few steps, then fast for a few steps, and slow again. Walk with quick changes of direction.
  • Strength training. Include exercises to strengthen the muscles of the back to improve posture. Examples include shoulder blade squeeze; standing rows with webbed gloves, drag bells, paddles or kickboards; bowstring pull with drag bells or resistance tubing; lat pull-down with webbed gloves, drag bells, paddles, resistance tubing or dumbbells; and chin tucks. Leg exercises against the resistance of the water will strengthen the quadriceps, hamstrings, gluteus maximus, gluteus medius and adductors.
  • Flexibility. Movements through their full range of motion promote flexibility. A form of exercise that uses full range of motion is Ai Chi created by Jun Kono of Japan and brought to the United States by Ruth Sova. Follow the link for a YouTube video of June Kono performing Ai Chi. It is also important to stretch at the end of class, while the muscles are still warm. Stretches can be static or dynamic. Examples of static stretches are clasping hands behind the back to stretch the chest, and lifting the heel in back with a pelvic tilt to stretch the quadriceps and hip flexors. Examples of dynamic stretches are swinging one leg forward and back through a full range of motion, and lifting one leg to the side, crossing the midline in front of the body, lifting it to the side again, and crossing the midline behind the body.
  • Ankle flexibility. Weak ankles or reduced range of motion in the ankles contribute to reduced stability. Some exercises to improve ankle flexibility are walking on toes or on heels – both forward and backward, rolling from heels to toes and back to heels, ankle circles, sitting on a noodle and writing your name with your foot, and squats keeping the heels on the floor. Squat with the feet in various positions, such as a narrow stance, a wide stance, toes pointing in, toes pointing out, or a tandem stance with one foot directly in front of the other.
  • Balance challenges. Asymmetrical movements require more core stabilization. Try walking, jogging, cross-country ski or jumping jacks with one hand on the hips or behind the back, or with each arm performing a different movement. Another challenge is to jog, ski or do jumping jacks with just one leg, keeping the other foot grounded. Stand and reach one arm as far forward as possible until you start to lose your balance. Reach your arm to the side and to the back until you start to lose your balance as well. Walk with one foot directly in front of the other or do a crossover step. Stand on one foot with and perform asymmetrical arm movements, or turn your head from side to side, or keep your head still and look from side to side, or close your eyes.
  • Unpredictable command. Improve your participants’ reaction time with the unpredictable command technique. Direct the class to perform unexpected movements. For example, walk diagonal, forward, backward, or sideways. Walk faster, knees higher, on toes or heels, with toes curled up or down or one of each. Look over your shoulder, tuck your chin, lower your shoulder blades, or touch your shoulder. Lift one arm to the side, front or back, lift both arms and let your fingers walk on the water. For more on the unpredictable command technique, see a previous blog post “Improve Reaction Time.”

Deep water exercise requires a lot of core stabilization, often leading to improved posture. My book, Water Fitness Progressions, includes 3 lesson plans, one for functional core strength, one for balance training, and one a Pilates fusion class for deep water. There are also variations of the same 3 lesson plans for shallow water. Now is a good time to start working on fall prevention.

See you in the pool!

Author/Instructor Photo
Chris Alexander