Which is better? There are differences in exercising in shallow water vs. deep water, but each has its own advantages.
Shallow Water. Nearly every pool that offers water fitness classes has shallow water, which is defined as a depth between mid-rib cage to mid-chest for most participants. This provides the benefits of both reduced impact and grounding forces that allow participants to maintain proper alignment and control. Shallow water provides resistance in every direction of submerged movement, which means both muscles in a muscle pair are trained. People who are limited because of impact concerns from land based training are able to exercise at an intensity to improve fitness. People at higher levels of fitness can train at higher intensities without experiencing increased musculoskeletal stress. Shallow water exercise burns calories comparable to land exercise. Wearing shoes provides traction and can allow for a more intense workout that burns more calories.
You can exercise at five impact levels in shallow water. Level I is performed in an upright position. Level II is performed by flexing the hips and knees to submerge the body to shoulder depth. Level III is performed without touching the pool bottom. Grounded movements are initiated in an upright position, but one foot remains in contact with the pool floor at all times. Propelled movement, or plyometrics, is jump training. People with osteoporosis can benefit from propelled movement because it involves some weight bearing. People with arthritis often find it more comfortable to exercise in water than on land because of the reduced impact.
You can train for cardiorespiratory fitness by increasing range of motion, increasing speed, and accelerating. You can train for strength by pushing against the water resistance or using equipment. You can train for core strength and balance by exercising on one foot or in other less stable positions, such as a tandem stance. Any kind of aquatic equipment can be used in shallow water. This includes buoyant equipment, such as foam dumbbells and noodles; drag equipment such as webbed gloves, Aqualogix bells, fins, paddles and Aqua Ohm; rubberized equipment such as bands and resistance tubing; aquatic steps; aqua poles; and aqua drum sticks.
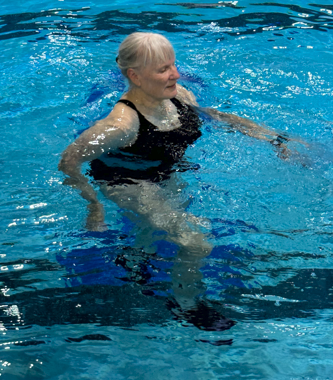
Deep Water. Fewer pools have a deep end, but those that do have seen a growth in popularity of deep water classes. Deep water exercise is performed at a depth that allows the participant to remain vertical while not touching the pool floor. A flotation belt should be worn for neutral buoyancy, which allows the participant to concentrate on working against the drag properties of the water as opposed to trying to stay afloat. Participants can move freely in all three planes of motion, creating a total-body workout, muscle balance and a substantial challenge for the core muscles without impact stress to the joints. Heart rates in deep water are lower than on land or in shallow water because of heat dissipation, hydrostatic pressure and limited gravitational forces. Research shows that there is no difference in oxygen consumption in spite of the reduced heart rate. When comparing land and water exercises, similar exercises performed at the same intensity require greater caloric expenditure in deep water.
There are no impact levels in deep water because there is no impact. However you can exercise in various positions. Upright is similar to Level I. Seated, as if sitting in a chair, is similar to Level II. Elevating the body with a scull is similar to Level III. Single leg moves while keeping the other leg vertically extended is similar to Grounded movements. Accelerated moves that propel the body upward by using the limbs to apply force against the water is similar to propelled moves. In addition you can challenge the core with off-axis moves, such as leaning diagonally to the side or forward. People with osteoporosis are advised to include resistance training in their routine, and you can certainly perform that in deep water; however it is advisable to also include weight bearing exercise, such as walking, if possible. Arthritis classes are offered in the deep end for those who appreciate a completely non-impact workout.
You can train for cardiorespiratory fitness in deep water by increasing range of motion, increasing speed, and accelerating. You can train for strength by pushing against the water resistance or using equipment. Maintaining neutral alignment works the core for the entire class period. Not all kinds of aquatic equipment are appropriate for deep water. The equipment must float if you don’t want to dive down to the bottom of the pool to retrieve a piece of equipment someone dropped. Buoyant equipment, such as foam dumbbells and noodles, and drag equipment that attaches to the body, such as webbed gloves and swim fins, work well. Drag equipment that floats, such as Aqualogix bells, and rubberized equipment can also be used. Aquatic steps; aqua poles; and aqua drum sticks can only be used in shallow water.
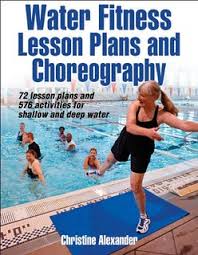
Conclusion. It comes down to personal preference. Some people prefer to have their feet on the ground/pool floor. Some prefer the freedom of movement in the deep end. There is no right or wrong answer. For more information about shallow water and deep water exercise, see the AEA Aquatic Fitness Professional Manual. For lesson plans for both shallow and deep water see my book Water Fitness Progressions.
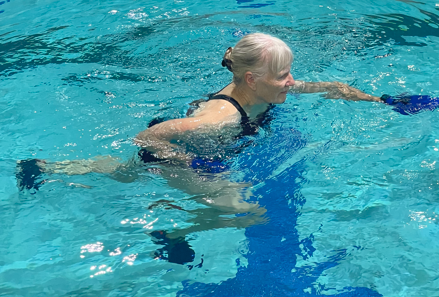
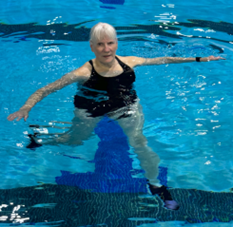
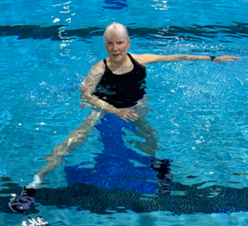
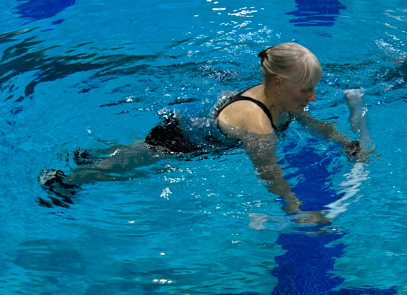
If you want a great workout in the pool, you can’t do better than deep water running. More research has been done on deep water running than on any other form of water exercise. Improvements in cardiorespiratory endurance and high calorie expenditure are well documented benefits. Deep water running can be practiced by everyone from elite athletes to water fitness class participants. Like every type of exercise, it should be performed with good form. That means that the spine is in neutral alignment, you are using a knee up/foot down motion, your shoulders are flexing and extending, your elbows stay bent and you are pulling them back so that your hand reaches your hips, your chest is erect, your shoulders are relaxed, your chin is level, and you are looking forward. In this position you are able to fully expand the lungs allowing your working muscles to get the oxygen they need. Click on Correct Form to see a video demonstration.
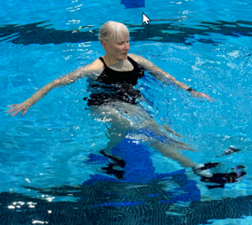
There are however some common mistakes in deep water running. The mistake I see most often is leaning forward, as in the photo on the right. In this position the water hits the chest first and slides down the torso, removing most of the resistance, and therefore most of the intensity. In addition, the position causes spinal compression, which means that the front edges of the vertebrae are touching. This can cause microfractures in someone with osteoporosis. There are also some common mistakes with the arm movement. These mistakes include swinging the arms across the chest, flexing and extending at the elbows, and not bringing the elbows back far enough. The shoulders should remain stationary, and not rock forward and back. The head should also remain level, and not rock from side to side. Click on Common Mistakes to see a video demonstration.
You can combine deep water running with assisting and resisting arm patterns to add muscular endurance training for the upper body. Some examples are (1) Crawl stroke, an alternating reach and pull motion; keep the arms under water where the resistance is. (2) Row, which is reaching and pulling with both arms together. (3) Double-arm press-down, which means stretching both arms out in front and pressing them down. (4) Breaststroke, which should be performed with the thumbs up to avoid combining internal rotation and horizontal abduction, a movement that is hard on the rotator cuff. (5) Rotator cuff sweep, which means keeping the elbows down near the waist and sweeping the hands out with the thumbs up. For more information on upper body exercises with deep water running, see Craig Stuart’s article “Wave Run” in the January-February-March 2026 issue of Akwa Magazine. Click on Upper Body Exercises with Deep Water Running for a video demonstration.
Deep water running can be performed at several intensity levels, depending on your goals. The basic deep water run is perfect for a water fitness class. Take it to a sprint if you wish to work harder or you are training for a 5k run. A power run is more intense, and can be used for intervals. Click on Increase Intensity for a video demonstration.
Although you do not run backward in daily life, traveling backward in the water is a good way to strengthen the back. For that reason I like to include some backward travel when I am doing a deep water running class. Again, good form is important. Participants frequently let their legs float up so that they are in a seated or semi-reclining position. This takes a lot of resistance out of the exercise, and the spine out of alignment, causing the spinal compression we wish to avoid. With the feet under the body, use a scull, a push forward or a reverse breaststroke to travel backward. Click on Travel Backward for a video demonstration.
I love deep water running. Try it out and you may love it too. See you in the pool!
Some people believe they work harder in a deep-water class if they don’t wear a belt. Well, they might work harder trying to tread water, but what does their posture look like? They either lean forward, or their legs drift toward the surface of the water, trying to create a larger surface area that assists flotation. All exercise is properly performed with good postural alignment, that is, with the head over the shoulders, the shoulders over the hips and the feet under the body. In good alignment without a deep-water belt, you sink. What about using a set of foam dumbbells in the hands to assist with flotation? If you do that, you are hanging your body weight from your shoulders which is not a good idea because the shoulder joint is not a weight bearing joint. You are also causing impingement to your rotator cuff and repeated impingement can cause a rotator cuff tear. (See my blog post on the shoulders.) You could try straddling a noodle. That limits the number of exercises you are able to do, and for me, having to repeatedly adjust the noodle is a distraction. Wearing a deep-water belt allows me to perform multiple exercises, in different positions, in good alignment, with no stress on my shoulder joint, while increasing and decreasing intensity at will. I can safely add any piece of equipment I choose because I am supported by my belt and not hanging from the equipment.
The best deep-water belt is one that feels comfortable for you and allows you to maintain good postural alignment. There are a wide variety of belts to choose from. Here are some of the options:
Hydro-Fit Classic Wave Belt. $59.95 in sizes S, M, L, and XL. Hydro-Fit was founded by Craig Stuart in 1987. You can’t go wrong with Hydro-Fit equipment. The belt is made of soft and durable EVA foam that forms to the natural shape of your body. It really is durable! I’ve had mine for years. If the strap or buckle wears out, you can get a replacement strap. (My strap hasn’t worn out yet.) There is a sizing chart on the website to help you choose the correct size. I like that it has even buoyancy around my waist so that I feel balanced in the water. Hydro-Fit also has an easy close Wave belt with a Velcro closure for those who have difficulty with the buckle. And they have a Wave belt pro with less buoyancy for a more challenging workout.
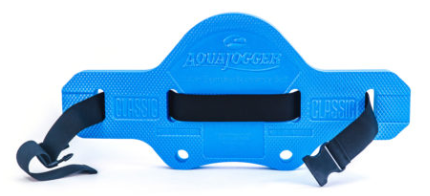
Aquajogger Classic Belt. $59.95. Aquajogger was founded in 1987. The company says that the contour design tones the abdominal muscles while strengthening the lower back. The extra buoyancy in back tends to pitch me forward a little bit, but is good for those whose bodies have extra buoyancy in front. The belt comes with a 48-inch elastic strap. The strap tends to stretch out over time, but replacement straps are available. Instead of sizes, Aquajogger belts come in 8 different shapes ranging from least buoyant to most buoyant, and ranging in price from $49.95 to $69.95.
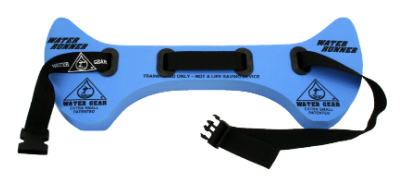
Water Runner Flotation Belt. $45.99. This belt is made by Water Gear which has been in business since 1994. It is made of soft, comfortable, closed cell EVA foam, which does not chip, break or absorb water. The strap is made of nylon, and replacement straps are available. The belt comes in size X-SM (under 100 lbs.), S (100-160 lbs.), MED (160-220 lbs.), and LG (220+ lbs.). The patented design is said to float the individual in the proper vertical position, relieving stress on the lower back. I find the wings on the side to be uncomfortable, but some people like them.
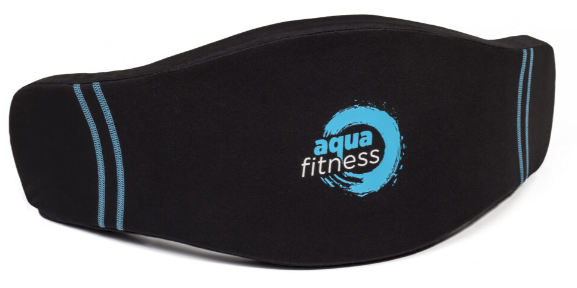
Speedo Aqua Fitness Jogbelt. $38.00. Speedo is an Australian company that has been around for over 100 years. They sell everything from swimsuits to goggles. Their deep water belt comes in size S-M which adjusts to waist sizes 25-48 inches, and size L-XL which adjusts to waist sizes 25-56 inches. That means that the foam part is one size and it is the strap that adjusts the fit. That may make the curving of the foam belt uncomfortable for some. The belt is made of soft chlorine resistant foam and it has a 6-month warranty against deficiencies in manufacturing. It is more affordable than some of the other deep-water belts, but it does not last as long.
Aqua Fitness Deluxe Flotation Belt. $27.99. This belt is made by Aqua-Leisure, a company founded in 1970. The belt is currently out of stock on their website, but you can find it on Amazon.com for $25.87. It is made out of EVA foam with a fabric cover that is designed to be soft on skin for less irritation. The strap adjusts to fit a 20-60 inch waist, which means it is one size fits all. Its slim design may not provide enough buoyancy for some adults. The brand recommends that the belt not be exposed to harsh sunlight for too long, but that is not a problem in an indoor pool.
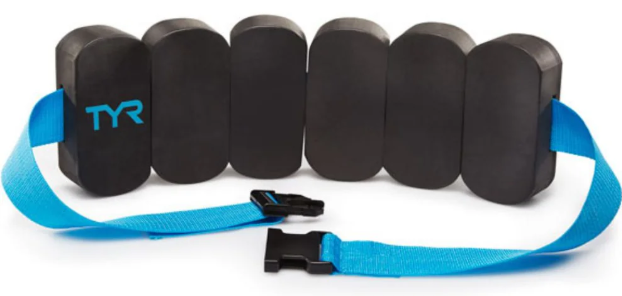
TYR Aquatic Flotation Belt. $37.43. TYR was founded in 1985. The blocks are made out of EVA foam, and the strap has an adjustable belt and clip system. The belt fits waist sizes 27-52 inches. You can slide the blocks around the strap so that you can have 2 blocks in the back, one on each side, and 2 in the front. Or have them all in back, or any other adjustment that works for you. The blocks are narrow and some people might need more than six to get enough flotation.
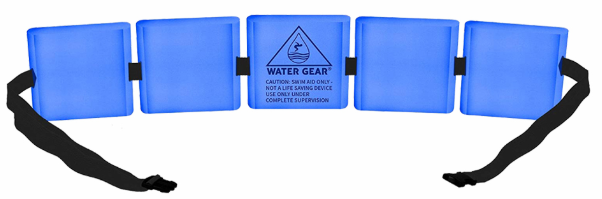
Water Gear also makes a block belt for $27.99. The blocks are made of closed cell EVA foam. The Water Gear blocks are larger than the TYR blocks which makes this belt a little more buoyant. Blocks can be removed to adjust the buoyancy for those who have a smaller waist or prefer less buoyancy. The strap is 2 inches wide and 60 inches long, with an adjustable buckle. Replacement straps are available.
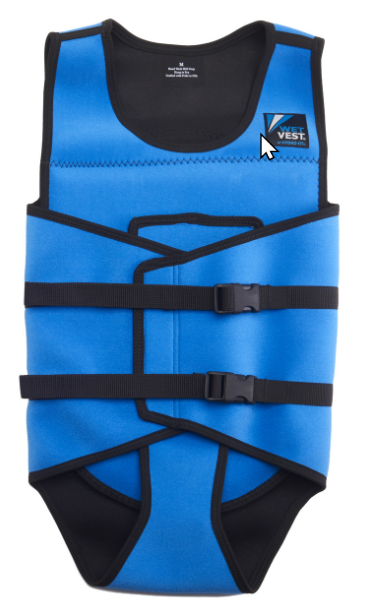
Wet Vest. For those who are serious about sports conditioning, cross training or aquatic therapy, Hydro-Fit makes the Wet Vest for $244.95. Its patented design incorporates flotation panels sewn into a comfortable and snug fitting body vest. Like a wet suit, it provides a thermal layer that insulates your body in the water. The wet vest works great for people who are uncomfortable wearing a belt around the waist due to injury or other medical issues, which is why it is often used by aquatic therapists. The Wet Vest allows maximum freedom of movement. It comes in blue or black, in sizes small, medium, large, X large and XX large.
Fitness Buoy. Buoy Products sells the Fitness Buoy for $59.95. Buoy Products is a relatively new company, founded in 2017, and their Fitness Buoy is a new concept in flotation devices. They also make a Body Buoy which is similar to the Fitness Buoy, but in grey and 5 other bright colors. The price of the Body Buoy is the same as the Fitness Buoy. They comes in sizes small, medium, large and X large. The equipment is designed to be worn like shorts and fasten around the waist and legs. They advertise that you can comfortably do full range of motion movements in deep water without your device digging into your ribs or riding up to your armpits.
There are other deep water belts out there. Let me know if you have a favorite that I did not mention, or if you are a fan of one of the pieces of equipment in this post. Whatever you do, put one on before you take your deep-water class. See you in the pool!
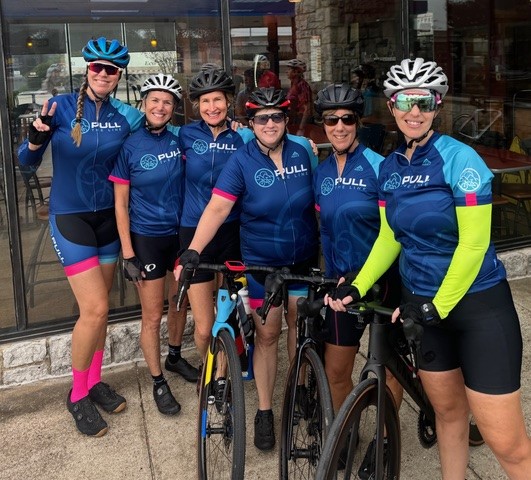
My guest blogger is Jennifer Davis, a participant in my deep-water class and a cyclist with her own blog, Pull the Line.
My journey with deep-water aerobics (DWA) began over a decade ago, when I was back in school later in life. I needed to fulfill my physical fitness credits for graduation, and after considering a few options, I decided to give deep-water aerobics a try. That decision was 12 years ago and little did I know then how much it would transform my fitness routine – and my life.
Since that first class, DWA has become an integral part of my fitness plan. Though my work schedule often makes it difficult to be a regular, I make it a priority to get into the pool whenever I can. Every time I step into that water, I leave feeling stronger, more energized, and connected to my body in a way that other workouts don’t offer.
What I love most about DWA is how it engages your entire body, especially the core. While I enjoy other activities like cycling, weightlifting, and walking, none of them work my core in the same way that deep-water aerobics does. The resistance of the water forces you to engage your muscles differently than gravity does on land. It’s challenging, but in the best way.
I owe a big part of my love for DWA to Chris, the instructor. She’s absolutely fantastic – both as a teacher and as a person. Chris has this way of creating a class environment that is welcoming and supportive. It doesn’t matter if you’re a beginner or someone who’s been doing it for years; she makes everyone feel at ease and confident in the water. Plus, the music she plays is always spot on.
Deep-water aerobics has given me something I didn’t even realize I was looking for: a full-body workout that’s kind to my joints, but still incredibly effective. I’ve learned that age is just a number, and it’s never too late to try something new. If you’re considering giving DWA a shot, I can’t recommend it enough. It’s a fun, low-impact way to get a killer workout that truly works the whole body.
So, If you’re thinking about diving in, trust me – you won’t regret it. Whether you’re looking to strengthen your core, improve your cardio, or just try something new, deep-water aerobics might be the perfect fit for you. See you in the pool!
A Little About My Passion:
I started Pull the Line to share inspirational stories, insights, and encouragement that has shaped my personal journey – and hopefully inspire others along the way. Whether it’s about finding strength in unexpected places, embracing new challenges, or simply staying motivated, I want to offer a little bit of encouragement to help you pull through the week with confidence and purpose.
For your weekly dose of inspiration, be sure to check out The Weekly Pull – I’d love for you to join me on this journey! Jennifer Davis
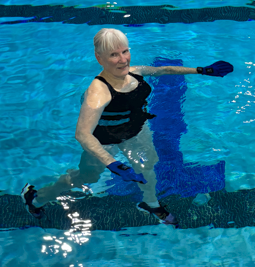
All exercise is properly performed with the spine in neutral alignment. In deep water, good posture is more challenging to achieve because the feet do not touch the floor. Beginning exercisers may find themselves curling forward, flailing the arms, and drifting. There are some things you can do to stabilize. The most important is to wear a deep-water flotation belt. Without it, you will find yourself sinking when you attempt to achieve upright neutral alignment. Use a stabilizing scull, sweeping the hands in and out, to control flailing and reduce drifting. Webbed gloves further increase stability. Learn to brace the core muscles. Include tucks in the warm up (tuck ski or jacks tuck) to engage the core. With practice, the core muscles will engage continuously and discreetly throughout the workout, which is why deep water exercisers so often see improvements in their posture. Below is a list of basic deep water exercises with descriptions. Click on the name of the exercise to see a short video demonstration.
Scull. Sculling is an important skill in deep water. Besides assisting in stabilization, you can use a propeller scull (a figure 8 hand motion) to travel. Hold the hands up in front of you and propeller scull to travel backward. Hold the hands down by your sides and propeller scull to travel forward. Extend the hands out to the sides and use the scull to lift the shoulders out of the water. This works great with jog, heel jog, bicycle, and flutter kick. Maintain the elevation for 30 seconds or more to up the intensity.
Knee-high Jog, Sprint, and Power Run. Jogging is one of the most basic of all moves. Lift the knees until the thighs are parallel to the floor in a knee-high jog. Lifting the knees higher than that tends to make you curl forward and puts a strain on the low back. To increase intensity, go into a sprint by adding speed. To increase intensity even further, go into a power run, which uses large, powerful arm movements that pull the water, and longer, more powerful leg movements.
Heel Jog. Instead of lifting the knees in front, heel jog lifts the heels in back, working the hamstrings. Check to make sure that the knees are staying down.
Skate Kick. A kick backward with straight legs works the gluteus maximus, a muscle that tends to be weaker from sitting too much. Watch that you are not bending the knees and turning the exercise into a heel jog.
Crossover Kick. The midline of the body is an imaginary line that goes through the nose and the bellybutton. Crossover kick crosses that midline. Since the right side of your brain controls the left side of your body, and the left side of the brain controls the right side of your body, crossing the midline of your body requires using both brain hemispheres, causing more neurons to fire and making more connections. It’s a good idea to include some exercises that cross the midline in every session.
1. Skate Kick
2. Crossover Kick
3. Sweep Out
4. Center
Skate Kick, Crossover Kick, Sweep Out and Center.I love this exercise! It challenges coordination, crosses the midline, and engages the core. One leg kicks back, then kicks across the midline, sweeps out to the side and returns to center. Perform the move alternating right and left legs.
Cross-country Ski. Cross-country ski is the ultimate deep water exercise! It uses long levers, works both the upper body and the lower body, and gets the heartrate up. Plus, there are multiple variations! In a neutral position the arms and legs should go forward and backward evenly. If the glutes are weak, it may be difficult to get full hyperextension of the hips. If you tilt the trunk back and focus too much on hip flexion, you end up just kicking forward. Check out your form by skiing with your back to the pool wall; your heels should tap the wall. Try shortening your range of motion so that your forward flexion is not greater than your backward hyperextension. As the glutes get stronger you can increase your range of motion.
Cross-country Ski Travel Backward and Forward. Traveling backward with cross-country ski is a challenge. You cannot propel yourself backward by pushing off the floor. Instead your push yourself backward with a powerful forward arm swing. This takes upper body strength! Turn your palm to face forward when you swing the arm forward, and slice on the swing backward. Do the opposite to travel forward. Turn the palm to face back when the arm swings backward, and slice when the arm swings forward.
Tuck Ski. Instead of tucking your knees up, tuck your feet under your body. That way when you go into the ski your flexion (with the front leg) and hyperextension (with the back leg) will be equal. Watch that you don’t power pop the knees when you lengthen the legs. Tuck ski is a good exercise for the warm up or for active recovery between intervals.
Cross-country Ski
with Rotation
Cross-country Ski with Rotation. This is another exercise that crosses the midline of the body. The rotation is in the upper body, and therefore the arms reach across the midline, while the legs move toward the corners. This is a difficult exercise for some people to master. They end up doing a crossover kick while sweeping both arms side to side, or a crossover kick reaching with the arm on the same side of the body. It looks and feels awkward. But once the move is mastered, you can really up the intensity because the range of motion is so large, the movement is in multiple directions, and you are creating lots of turbulence.
Cossack Kick. My class likes this move. Begin with the heels together and the knees apart, in a diamond position. The shoulder blades are contracted with the elbows bent and the hands out to the sides, thumbs up. Now kick the legs out to the sides and at the same time reach the arms out to the sides. It looks a little like a marionette dancing.
Jumping Jacks. If you perform jumping jacks in deep water the same way you perform them on land, you will find yourself bobbing up and down. Performing them with arms and legs opposite solves the problem. Think of making a capital letter T with your body followed by a capital letter A.
Jumping Jacks Travel Sideways. If you want to travel sideways with jumping jacks you need a different arm and leg motion. Use only one side of your body. If you are traveling to the right, your right arm and right leg reach out to the side, then pull them both straight to center. Use the left arm and leg to travel to the left. Be sure to keep the leg straight, working the inner thigh. A common mistake is bending the knee, since short lever moves are easier than long lever moves. But this turns the move into a Cossack kick and works the hamstrings instead of the inner thigh.
Jacks Tuck. For this exercise tuck your knees up and bring your arms down to the sides. Then abduct the hips (bring the legs out to the sides) while lifting your arms to the side toward the surface of the water. Jacks tuck is another good exercise for the warm up or for active recovery between intervals.
Inner Thigh Lift.Begin with your legs wide apart. Lift one inner thigh toward the surface of the water while the opposite hand reaches down to touch the inner thigh. You can also touch the lower leg or even the ankle if you can reach it, but watch that you do not lean forward to accomplish this. It is more important to keep the spine in neutral than to touch the ankle. Work in your feel good range of motion. It is okay to bring the legs closer together if wide apart is uncomfortable for you, but if the legs are too close together the exercise becomes a knee-high jog.
Accelerate the Legs to Center Elevating the Shoulders. Elevation is a power move that begins with the legs apart, either front to back or side to side, followed by a forceful acceleration of the legs to center. As the straight legs come together the shoulders lift out of the water. There are four exercises that use this technique: cross-country ski with elevation, tuck ski together, frog kick, and breaststroke kick. All of them are great exercises to use in interval training.
Cross-country ski
with Elevation
Cross-country Ski with Elevation. Use your full range of motion for this ski, then forcefully pull the straight legs to center. Repeat. Repeat. Repeat.
Tuck Ski Together.Begin by tucking the feet under your body before going into a full range of motion ski then bringing the straight legs to center. Add some speed and perform the move smoothly. If you are a swimmer you will recognize this as a vertical scissors kick. For non-swimmers, a common mistake is going back into a tuck before the straight legs come together; this takes the power and elevation out of the move.
Frog Kick. This is another move swimmers will be familiar with. Begin by lifting the knees wide to the sides. Straighten the legs into a full range of motion jacks position. Then forcefully accelerate the straight legs to center. Again, a common mistake is tucking the knees back up before the straight legs come together, and then the move is essentially a jacks tuck.
Breaststroke Kick. Instead of lifting the knees wide to the sides as in the frog kick, lift the heels up in back. Then straighten the legs into a full range of motion jacks position and forcefully accelerate the straight legs to center. Both the breaststroke kick and the frog kick are lateral moves, but in the breaststroke kick the legs lift in back first and in the frog kick the knees lift to the sides first.
Side to Side. Begin by tucking your feet under you. Then extend both legs to one side in a side-lying position. Tuck again and extend both legs to the other side. Try to keep the feet close together. Foam dumbbells held out to the sides assist with stabilization for this exercise. It can be performed without dumbbells; in that case stabilize with a scull.
Abdominal Pike and Spine Extension. This is my favorite move for working the abdominals and erector spinae. Begin by tucking your feet under you. Then go into a pike, or a capital letter “L” position. Tuck again and extend both legs 45 degrees to the back. Try to keep the feet close together. Foam dumbbells held end to end on the surface of the water assist with stabilization; keep them on the surface of the water and let your abdominals do the work. This exercise can be performed without dumbbells; in that case stabilize with a scull.
Burpee: 1. Plank
2. Tuck
3. Drop the legs
4. Elevate
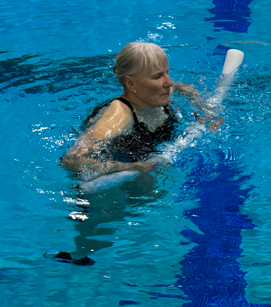
Burpees. This is a fun move! You need to use a noodle, preferably one of the denser more buoyant ones. Begin in a plank position. Tuck the feet under you and then drop the legs down to neutral, letting the noodle rise toward the surface. Push the noodle back down and flutter kick to lift the shoulders out of the water. Tuck your feet under you again and go back into a plank position.
Once you get comfortable in deep water you can really get a great workout. I enjoy the freedom of moving without my feet touching the floor. The late John Spannuth, the founder of the US Water Fitness Association, compared deep water exercise to flying. If you would like to know more about deep water exercise, check out my books. Water Fitness Lesson Plans and Choreography has lots of photographs and cues that tell you what muscles you are working. Water Fitness Progressions tells you how to progress your exercises from basic to high intensity interval training, plus lesson plans using various types of equipment.


Leave a Reply